Table of Contents
- Tools Needed for Wall Preparation
- Step 1: Clear the Room and Protect Surfaces
- Step 2: Wash Walls and Remove Grease
- Step 3: How to Repair Drywall Holes and Cracks
- Step 4: Do I Need to Sand Walls Before Painting?
- Step 5: Apply Primer for Adhesion and Sealing
- Step 6: Address Mold and Mildew Before Painting
- Climate and Environmental Factors in Wall Prep
- Frequently Asked Questions
Last Updated: October 1, 2026
Tools Needed for Wall Preparation
Knowing how to prepare walls properly is the single biggest factor separating a paint job that lasts a decade from one that peels within two years. At Rooster Painting, we’ve spent over 19 years prepping North Texas homes, and the tools you gather before you start matter as much as the technique.
Here’s the core kit: a bucket and sponge, a putty knife, joint compound, sandpaper in multiple grits, a sanding pole, painter’s tape, drop cloths, a tack cloth, and primer. For larger jobs, an orbital sander speeds things up considerably.
Safety Gear and Environmental Protection
Before touching a wall, protect yourself and the room. Wear safety glasses and a dust mask when sanding, since drywall dust and old paint particles become airborne quickly. If your home was built before 1978, the EPA lead-based paint renovation rules require certified handling of any disturbed paint.
Ventilation matters too. Open windows and run a fan to keep dust and fumes moving out of your work area.
Step 1: Clear the Room and Protect Surfaces
Every successful paint job starts with an empty room. Remove furniture, wall hangings, and outlet covers. Anything you can’t move, push to the center and cover with plastic sheeting.
Lay drop cloths over the entire floor. Canvas cloths grip better than plastic and won’t slide underfoot. Tape off trim, windows, and door frames with painter’s tape.
This prep work feels tedious. Skip it and you’ll spend twice as long scraping paint off baseboards later.
Step 2: Wash Walls and Remove Grease
Walls collect grease, dust, and cooking residue that prevent paint from bonding. Wash every surface with a degreaser or a mild detergent solution, working from the bottom up so drips don’t streak clean areas.
Kitchen walls and areas near light switches need extra attention. Grease buildup is invisible until paint starts peeling off in sheets.
Rinse with clean water and let the walls dry completely.
How Long to Wait After Washing Walls Before Painting
Wait at least 24 hours after washing walls before painting. In humid conditions, give it 48 hours. Paint applied to damp drywall traps moisture, which causes blistering and poor adhesion.
Test for dryness by pressing a paper towel against the wall. If it comes away damp, wait longer.
Step 3: How to Repair Drywall Holes and Cracks
Small holes and cracks are easy to fix yourself. Apply joint compound with a putty knife, let it dry, sand it smooth, and repeat until the patch sits flush with the surrounding wall.
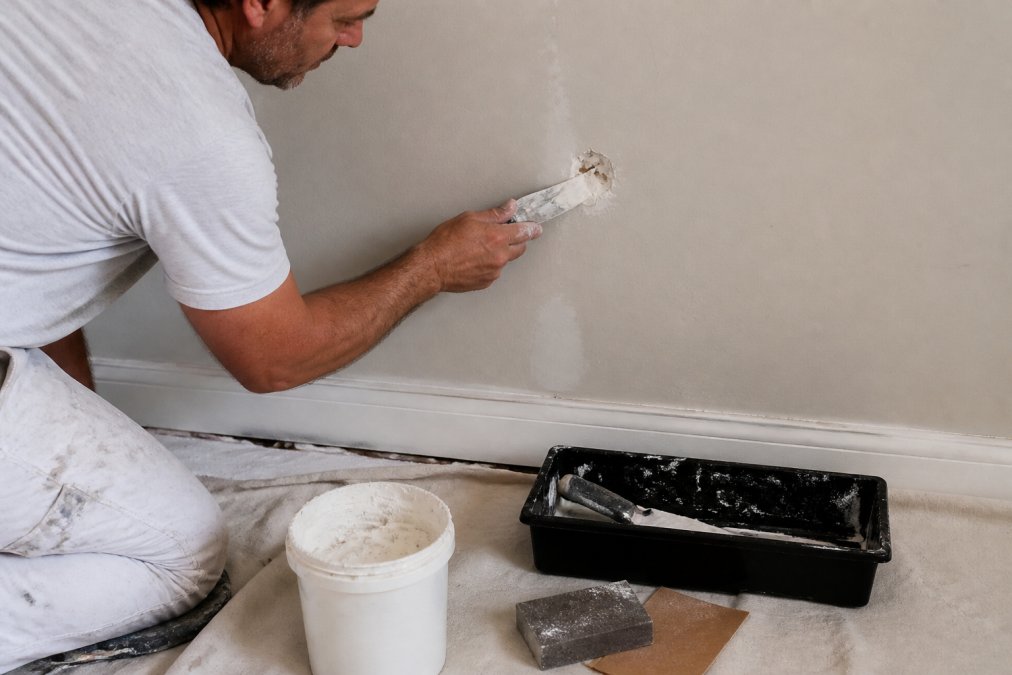
For larger damage, Rooster Painting handles drywall repair and popcorn ceiling removal as part of a complete painting service, so you don’t need three separate contractors.
Removing Wallpaper Glue Residue
Wallpaper glue leaves a sticky film that ruins paint adhesion. Spray the wall with warm water, let it soak for 15 minutes, then scrape with a wide putty knife. Repeat until the surface feels smooth and dry.
Click here to Schedule Free Quote →
A common mistake is painting over glue residue.
Step 4: Do I Need to Sand Walls Before Painting?
Yes, you should sand walls before painting in most cases. Sanding does two things: it knocks down ridges left by patched joint compound, and it creates a slightly rough surface, called a “profile” or “tooth”, that gives primer and paint something to grip. Glossy or semi-gloss walls are the ones that most need it, because cured alkyd and acrylic finishes are slick enough that paint can slide off in sheets.
Choosing the Right Grit
Grit selection is where most DIY jobs go wrong. Too coarse and you gouge the wall; too fine and you polish the surface instead of scuffing it.
- 80-100 grit: Heavy scuffing on glossy trim, stubborn patched areas, and old oil-based paint. Use sparingly on drywall.
- 120-150 grit: The default for previously painted walls and general scuff-sanding. This is the grit you reach for most often.
- 180-220 grit: Final pass between primer and topcoat, and for feathering the edges of fresh joint compound so the patch disappears.
- 320 grit or finer: Wet-sanding between finish coats only. Never use it to prep a bare wall, it’s too fine to create tooth.
Mechanical vs. Chemical Stripping
Mechanical stripping means sanders, scrapers, and heat guns. It’s fast on flat surfaces but generates dust and, on pre-1978 homes, can aerosolize lead. If you go this route on an older home, use a HEPA-equipped sander and follow the EPA lead-safe renovation requirements.
Sanding Techniques for Plaster and Drywall
Plaster and drywall behave very differently under a sander, and treating them the same is how walls get ruined.
Dust Control and Cleanup
Drywall dust is fine enough to float through a room and settle on every surface. Tape plastic over doorways, run a box fan with a furnace filter taped to the back to pull dust out of the air, and wear an N95 respirator, not just a dust mask.
Step 5: Apply Primer for Adhesion and Sealing
Primer is not optional. It seals porous surfaces, blocks stains, and creates a uniform base so your top coat looks even and touches up cleanly. Skipping primer over fresh joint compound, bare drywall, or a color change from dark to light is the single most common reason a DIY paint job looks blotchy.
Matching Primer to the Surface
There is no universal primer. The right choice depends on what’s underneath:
- Bare drywall and fresh joint compound: Use a PVA (polyvinyl acetate) drywall primer. It’s inexpensive, dries fast, and seals the thirsty paper and compound so your topcoat doesn’t soak in unevenly. Don’t use it over existing paint, it has poor adhesion to cured finishes.
- Previously painted walls in good condition: A water-based acrylic bonding primer is the workhorse. It grips glossy and semi-gloss surfaces without sanding them down to bare substrate.
- Glossy or slick surfaces (tile, laminate, cured oil paint): Use a bonding primer labeled for hard-to-stick surfaces, or scuff-sand first and follow with a shellac- or urethane-based primer.
- Water stains, smoke, or marker: Use a shellac- or oil-based stain-blocking primer. Water-based stain blockers often let tannins and nicotine bleed through. Shellac is the most reliable for severe stains but smells strong and needs ventilation.
- Knots and bare wood trim: Use a shellac-based primer to seal knots, or the sap will bleed through the topcoat as a brown stain.
- Mold-prone areas: Use a mold-resistant primer after remediation, but only after the moisture source is fixed.
Application and Dry Times
Apply primer with a ⅜-inch nap roller for smooth walls or a ½-inch nap for textured surfaces. Cut in edges with a 2- to 2½-inch angled brush. Work in overlapping passes and don’t over-roll, primer flashes off fast, and going back over a half-dry section leaves lap marks.
- High humidity (above 60 percent): Add 50-100 percent to the recoat time. A primer that’s dry to the touch can still be soft underneath, and topcoating too soon traps solvent and causes blistering.
- Cold rooms (below 60°F): Water-based primers coalesce poorly. Warm the room to at least 65°F before and during application.
- Over fresh joint compound: The compound itself is still curing for days after it feels dry. A PVA primer locks it down, but don’t expect the wall to be fully stable for 24-48 hours.
Choosing Between Lining Paper and Paint
Lining paper smooths minor imperfections and hides uneven texture, making it a good option for older plaster walls with surface flaws. Paint offers a faster, more durable finish with less prep.
Step 6: Address Mold and Mildew Before Painting
Mold and mildew must be removed before painting, or they’ll bleed through the new finish and return. Wash affected areas with a diluted bleach solution or a commercial mold cleaner.
Climate and Environmental Factors in Wall Prep
North Texas humidity and temperature swings affect how walls accept paint. High humidity slows drying and weakens adhesion, so avoid painting when indoor humidity climbs above 60 percent.
Frequently Asked Questions
What is the best prep for walls before painting?
The best prep combines cleaning, repairing, sanding, and priming. Start by removing dust and grease with a degreaser or mild detergent. Patch any holes with spackle or joint compound, then sand smooth. Apply a quality primer to seal the surface and improve adhesion. This sequence ensures your top coat bonds properly and lasts for years.
Do I need to wash walls before I paint them?
Yes, washing removes grease, dust, and grime that prevent paint from adhering. Use a degreaser or mild soap and water, then rinse. Allow walls to dry completely, typically 4 to 6 hours depending on humidity. Skipping this step can cause peeling and uneven finish, especially in kitchens and bathrooms where residue builds up.
How do you repair drywall damage before painting?
For small holes, apply spackle or joint compound with a putty knife, let it dry, then sand smooth. Larger holes may need a patch or mesh tape. After repairing, prime the patched area so it absorbs paint evenly. This prevents flashing, where the patch shows through the top coat.
Is it necessary to prime walls before applying new paint?
Priming is essential for bare drywall, patched areas, or when changing colors dramatically. Primer seals porous surfaces, blocks stains, and improves adhesion. If your walls are clean and previously painted with a similar color, a paint-and-primer combo may work, but a dedicated primer delivers better results and longer-lasting finish.