Table of Contents
- What Makes Quality Painting Different
- The Importance of Surface Preparation in Painting
- Inspecting Cut-in Lines and Trim Work
- Evaluating Paint Coverage and Consistency
- Signs of a Bad Interior Paint Job to Watch For
- How Long Should a Professional Paint Job Last
- Questions to Ask House Painters Before Hiring
- Conclusion
- Frequently Asked Questions
Last Updated: October 2, 2026
What Makes Quality Painting Different
Spot quality painting by understanding one simple truth: what you see on the wall is the result of everything that happened before the brush touched it. Most homeowners focus on the final coat.
Spotting quality painting means understanding what separates a job that lasts five years from one that lasts fifteen. The difference isn’t always obvious at first glance. It reveals itself over time through durability, consistency, and how well the paint adheres to the surface.
When you learn to spot quality painting, you’re really learning to recognize three things: proper surface preparation, the right materials applied correctly, and meticulous attention to detail. Each one matters equally. Skip one, and the whole job fails.
The Importance of Surface Preparation in Painting
Surface preparation determines whether paint sticks or peels.
The Core Preparation Steps
Proper surface preparation includes:
- Cleaning all dirt, dust, and grease from the surface using appropriate methods (TSP, trisodium phosphate, for heavy soiling, or degreaser for kitchen walls)
- Sanding rough areas smooth for paint adhesion (typically 120-150 grit for drywall, 80-120 grit for wood)
- Filling holes and cracks with appropriate filler (spackling for small holes, joint compound for larger areas, wood filler for wood substrates)
- Priming bare wood, new drywall, or any substrate that hasn’t been painted before
- Protecting areas that shouldn’t be painted with painter’s tape and drop cloths
The reason this matters: paint doesn’t actually stick to dirt or gloss. It sticks to the substrate itself.
Primer Selection and Application
Primer is not optional, it’s foundational. Quality painters select primer based on substrate type, not just cost:
- Drywall and new construction: Use a drywall primer (often called “PVA primer”) that seals the porous drywall surface and prevents the topcoat from being absorbed unevenly
- Bare wood: Use an oil-based or latex wood primer that prevents tannin bleed-through and provides adhesion
- Glossy surfaces: Use a bonding primer or primer-and-paint-in-one formulated to adhere to glossy finishes without sanding (though light sanding is still recommended)
- Stained or water-damaged areas: Use a stain-blocking primer to prevent bleed-through
- Metal: Use a rust-inhibiting metal primer
Budget painters often use the same primer for all substrates to save money.
Verifying Preparation Quality
When inspecting a painted surface, look for signs of poor preparation.
You can verify preparation was done correctly by:
- Running your hand over the surface, it should feel smooth, not rough or gritty
- Checking for visible dust or debris trapped in the paint film (a sign the surface wasn’t cleaned before painting)
- Looking for cracks or holes that weren’t filled
- Examining trim and edges for primer coverage, bare wood should never be painted with topcoat only
- Asking the painter to show you their prep work before they prime (a professional will welcome this)
DIY vs. Professional Preparation Standards
A DIY painter might sand a wall, wipe it down, and paint. A professional painter will:
- Use a tack cloth or damp rag after sanding to remove all dust
- Allow adequate drying time after cleaning (especially important in humid conditions)
- Prime all bare substrates, even if the homeowner says “just paint over it”
- Sand between primer and topcoat to ensure adhesion
- Inspect the surface under raking light before applying the first topcoat
Many homeowners don’t realize that surface preparation typically takes longer than painting itself.
Inspecting Cut-in Lines and Trim Work
Cut-in lines are where the wall meets the trim, ceiling, or another wall. This is where quality becomes immediately visible.
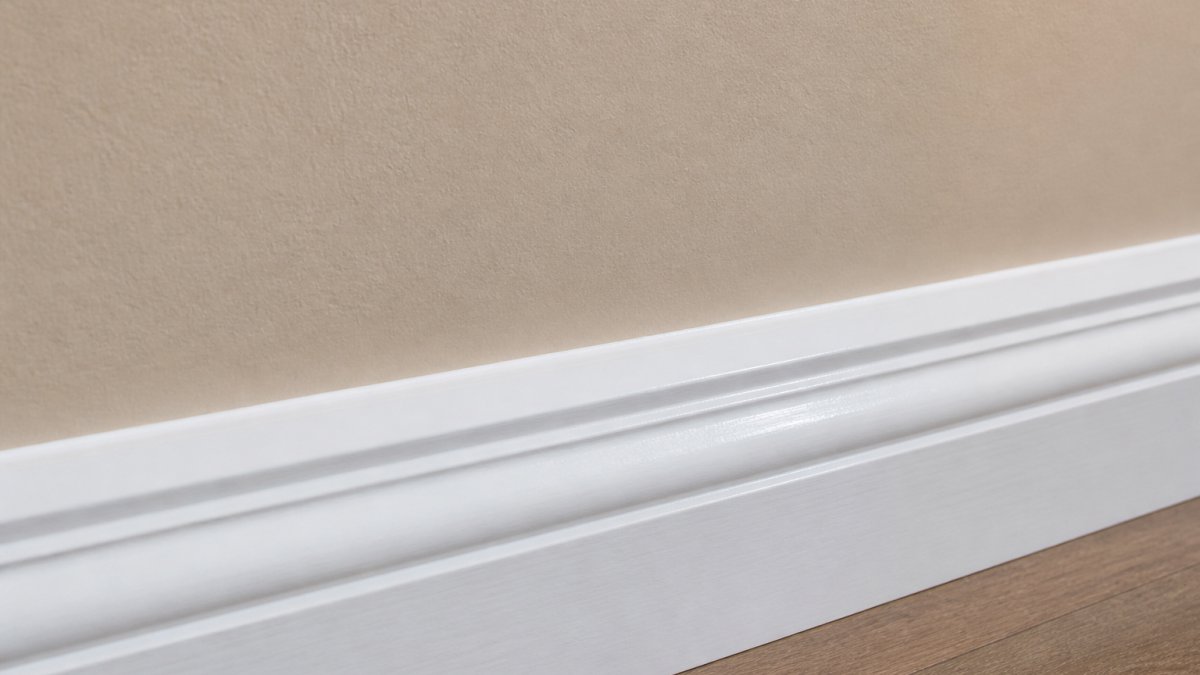
When inspecting cut-in lines, look for:
- Straight edges with no wavering or wobbling
- No paint bleeding onto adjacent surfaces
- Even coverage with no thin spots or holidays
- Clean separation between colors or finishes
- No drips or sags along the line
A “holiday” is painter’s term for a missed spot or thin area where the substrate shows through.
The best way to inspect trim work is with strong, directional lighting.
Professional trim work shows no visible brush marks. The paint appears smooth and uniform.
Evaluating Paint Coverage and Consistency
Paint coverage means the substrate is completely hidden and the color is uniform across the entire surface.
Using Raking Light to Inspect Coverage
The most effective tool for evaluating coverage is directional or “raking” light.
Assessing Mil Thickness and Paint Solids
Quality paint jobs achieve consistent mil thickness, typically 2-3 mils per coat for interior latex paint. Uneven mil thickness indicates the painter applied paint inconsistently, which compromises durability and appearance. While homeowners rarely measure mil thickness with a gauge, you can infer it by:
- Observing whether the paint fully obscures the substrate in one coat (it shouldn’t; two coats are standard)
- Checking if the paint feels uniform to the touch, quality coverage should feel smooth and even, not thin in some areas
- Noting whether the paint has adequate hide rating (the ability to conceal the substrate)
Color and Sheen Uniformity
Click here to Schedule Free Quote →
Uneven coverage happens when:
- The painter didn’t apply enough paint per coat
- They used low-quality paint with poor hide or flow characteristics
- They didn’t allow proper drying time between coats
- They applied paint too thickly in some areas and too thin in others
- They failed to maintain a wet edge while painting, causing lap marks
Quality paint jobs typically require two coats on walls and three on trim or previously stained surfaces.
To evaluate coverage, stand at different angles and distances from the wall. Look at it in natural light and artificial light.
The Lap Mark Test
Signs of a Bad Interior Paint Job to Watch For
Poor paint jobs share common warning signs. Learning to recognize them helps you avoid hiring painters who cut corners.
Red flags that indicate poor quality work:
- Visible brush marks or roller stipple that doesn’t smooth out
- Drips, sags, or runs that weren’t sanded smooth
- Uneven color or sheen across the wall
- Paint peeling or blistering within the first year
- Bleeding where paint bled onto adjacent surfaces
- Rough or bumpy texture instead of smooth finish
- Visible caulking gaps or poorly finished trim
- Dust or debris trapped in the paint film
Peeling paint within the first year almost always indicates poor surface preparation.
Blistering appears as bubbles in the paint. This happens when moisture gets trapped under the paint film.
Chalking is when the paint surface turns chalky and rubs off on your hand.
How Long Should a Professional Paint Job Last
A quality interior paint job should last seven to ten years before needing a refresh. Exterior paint typically lasts five to seven years due to weather exposure. These timelines assume proper surface preparation, quality materials, and correct application.
Several factors affect paint durability:
- Material quality: Premium paints last longer than budget options
- Surface preparation: Properly prepared surfaces hold paint longer
- Application technique: Correct application affects adhesion and durability
- Environmental conditions: Humidity, temperature, and sunlight all impact longevity
- Maintenance: Regular cleaning and touch-ups extend paint life
If paint starts failing after two or three years, something went wrong during application. This could mean inadequate surface prep, low-quality paint, or improper technique. A quality job shouldn’t fail that quickly under normal conditions.
Rooster Painting backs quality work with a worry-free warranty. This confidence comes from knowing that proper preparation and materials create lasting results.
Questions to Ask House Painters Before Hiring
Before hiring any painter, ask these questions to assess their approach and professionalism:
About surface preparation:
- How do you prepare surfaces before painting?
- Do you sand between coats?
- What do you do if I have glossy or previously painted surfaces?
- Will you prime all bare wood or new drywall?
About materials:
- What brand and quality of paint do you use?
- Why did you choose that paint?
- Do you adjust primer based on the substrate?
- What’s your warranty on materials?
About the process:
- How many coats will you apply?
- How long do you allow between coats?
- How do you inspect your work for quality?
- What happens if I’m not satisfied with the finish?
About communication:
- How often will you update me during the project?
- What happens if something unexpected comes up?
- Do you provide a written estimate before starting?
- Can I see references or photos of previous work?
Quality painters welcome these questions. They have clear answers because they follow consistent processes. If a painter gets defensive or vague, that’s a warning sign.
Ask specifically about surface preparation. Many painters rush this step to save time. A painter who budgets extra time for prep is prioritizing quality. Ask to see examples of their trim work and edge quality. Request references from recent jobs so you can ask customers directly about durability and communication.
Conclusion
Spotting quality painting requires understanding what happens before the brush touches the wall. Surface preparation, material selection, application technique, and attention to detail all matter equally. When you know what to look for, you can hire painters who deliver results that last.
Rooster Painting specializes in the kind of meticulous preparation and premium materials that create lasting finishes. Our process includes proper surface prep, Sherwin-Williams paint application, and detailed inspection at every stage. Click here to Schedule Free Quote and experience the difference that quality painting makes for your home.
Frequently Asked Questions
What are the visual signs of a high-quality interior paint job?
A quality interior paint job shows straight, clean cut-in lines along trim and edges with no paint bleeding onto adjacent surfaces. The paint coverage is uniform with consistent color and sheen across all walls. Look for smooth surfaces free of brush marks, roller stipple, or visible drips. The finish should feel smooth to the touch, and there should be no holidays (missed spots). Professional painters ensure proper surface preparation, primer application, and multiple topcoats to achieve this level of quality.
How can you tell if a painter used premium materials?
Premium paint typically provides better coverage, durability, and color retention. Ask the painter which brands they use, reputable manufacturers like Sherwin-Williams are industry standards. Premium paints have higher pigment density and better adhesion properties, which means fewer coats needed and longer-lasting results. Request documentation of the paint brand and type used. Quality painters will discuss paint selection upfront and explain why specific products suit your project. Poor-quality paint often shows signs of early failure like peeling, chalking, or blistering within the first few years.
What should you look for when inspecting trim and cut-in lines?
Trim and cut-in lines are critical indicators of craftsmanship. Inspect edges where walls meet trim, ceilings, and corners. Lines should be straight and clean with no paint bleeding onto adjacent surfaces. The paint should cover completely without thin spots or holidays. Use a light at an angle to spot imperfections, brush marks indicate rushed work. Professional painters use proper masking tape, quality brushes, and take time to create crisp edges. Poor cut-in work suggests the painter rushed or lacks attention to detail, which often indicates lower overall quality.
How do professional painters ensure a smooth, durable finish?
Professional painters follow a systematic process: thorough surface preparation including sanding and cleaning, proper primer application to ensure paint adhesion, and careful application of topcoats with attention to mil thickness (paint depth). They control environmental conditions like temperature and humidity, use quality tools, and apply paint in proper sequences. Long-term durability depends on substrate preparation, inadequate sanding or cleaning leads to peeling and blistering. Professionals also use paint specifically formulated for the surface type and climate, ensuring the finish resists wear, moisture, and UV damage for years.