Quick Summary
Professional painting lasts longer because crews prepare surfaces properly, use quality paint and the right primer, apply coats at correct thickness and timing, and account for weather. Most early failures come from skipped prep, not the paint itself.
- Clean, sand, and repair surfaces before priming, even when they look fine.
- Use the correct primer so paint grips the surface and blocks stains.
- Apply the second coat only after the first passes the manufacturer’s recoat time.
- Paint over an active moisture problem traps it and causes early failure.
- Wood siding and trim typically last roughly 5-10 years with quality coating and good prep.
Table of Contents
- What Actually Determines How Long a Paint Job Lasts
- Surface Preparation for Painting: Where Most Paint Jobs Fail
- Professional-Grade Paint Benefits Compared to Budget Options
- Application Technique, Coat Consistency, and Curing Time
- How Long Does Exterior Paint Last, and What Changes It
- Signs a House Needs Repainting Before Damage Spreads
- Booking a Professional Repaint for Lasting Results in North Texas
- Frequently Asked Questions
What Actually Determines How Long a Paint Job Lasts
Most homeowners assume the paint itself decides how long a paint job holds up. That’s only part of it. A paint job’s longevity depends on several factors, including how the work is done.
The main factors include surface preparation, paint quality, primer choice, application technique, and drying conditions. Weak performance in any one of these can shorten a paint job’s life, no matter how good the rest of the work is.
Here is what usually matters most:
- Surface condition: Loose, dirty, or glossy surfaces stop paint from bonding well.
- Paint quality: Higher-grade paint typically holds color and resists wear better.
- Primer: The right primer helps paint grip the surface and block stains.
- Application: Even, correctly thinned coats dry without weak spots.
- Environment: Heat, humidity, and sun exposure all change how paint cures and ages.
These details can affect how a paint job holds up.
Surface Preparation for Painting: Where Most Paint Jobs Fail
Paint can peel, chip, or bubble for different reasons. Surface preparation is one factor that can affect the result.
Proper preparation protects the paint’s bond to the wall or siding. It also gives the finish a smooth, even look. For a detailed walkthrough, see our step-by-step guide on preparing walls for painting.
Cleaning, Sanding, and Repairing Before Primer
Preparation can affect how the finished paint job looks and holds up.
Watch out: Painting over dirt, grease, or loose paint is one of the most common reasons a new finish fails early. Clean and repair first, even when the surface looks fine.
Why Primer and Adhesion Matter
Primer and surface condition can affect how paint adheres and how the finish looks.
Professional-Grade Paint Benefits Compared to Budget Options
Paint quality can affect how a finish looks and holds up.
| Factor | Professional-Grade Paint | Budget Paint |
|---|---|---|
| Color retention | Holds color longer | Can fade sooner |
| Washability | Handles repeated cleaning | May dull with scrubbing |
| Coverage | Often covers in fewer coats | May need extra coats |
| Weather resistance | Better suited to exterior use | Varies widely |
At Rooster Painting, we use premium materials like Sherwin-Williams paint.
Quality paint only helps when it is applied to a properly prepared surface. Product choice and prep work should go hand in hand.
Application Technique, Coat Consistency, and Curing Time
Application technique can affect coverage, texture, and durability.
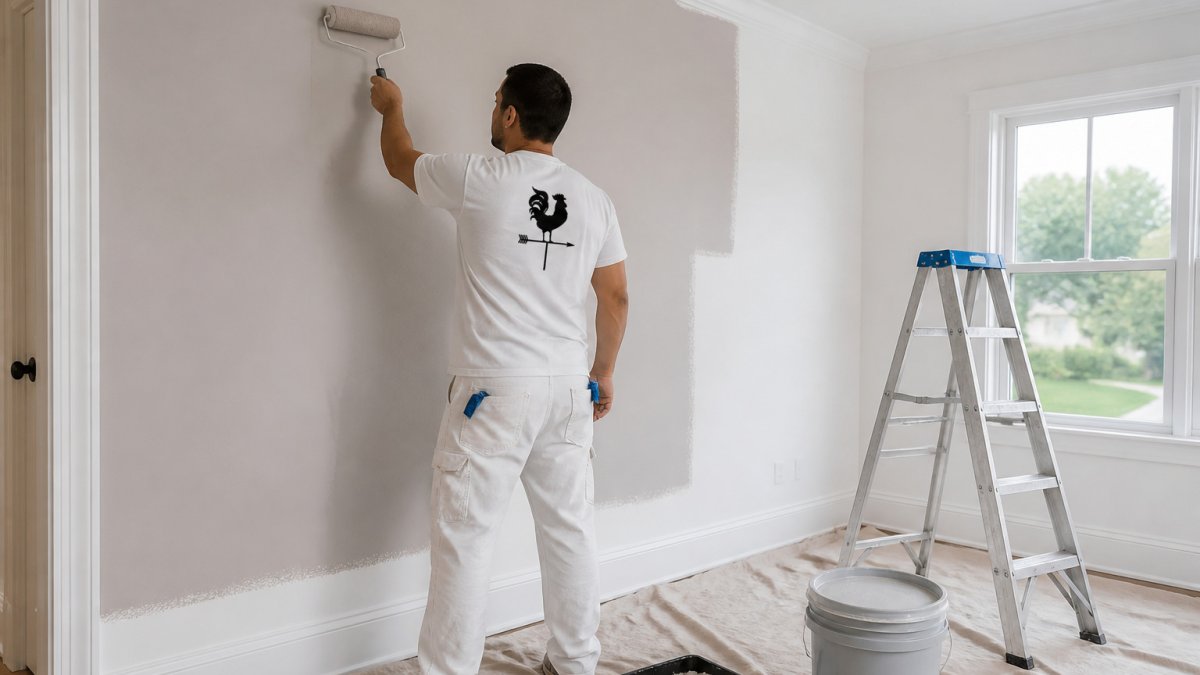
The Professional Application Sequence
A skilled crew works in a repeatable order rather than jumping straight to the roller. A common professional sequence looks like this:
- Inspection and moisture check. Before any product is opened, the crew checks for moisture intrusion, failing caulk, and substrate damage. Painting over an active moisture problem traps it and guarantees early failure.
- Masking and protection. Floors, fixtures, and adjacent surfaces are covered so the crew can work at full speed without cutting corners near edges.
- Priming. The correct primer is applied to bare or repaired areas and allowed to dry to the manufacturer’s recoat window.
- Cut-in. Edges, corners, and trim lines are brushed first so the rolled field can overlap into wet cut-in lines, this is what prevents lap marks and picture-framing.
- Field application. Paint is applied in a consistent wet edge, working in manageable sections so the crew never rolls back into paint that has already begun to set.
- Second coat. Applied only after the first coat passes the manufacturer’s recoat time, not merely when it feels dry.
- Final inspection and touch-up. The crew walks the job under proper lighting to catch thin spots, drips, and missed areas before demobilizing.
Coat Consistency and Loading
Experienced painters pay attention to:
Click here to Schedule Free Quote →
- Thinning and loading: Paint applied too thick can crack or sag. Paint applied too thin may need extra coats and wear unevenly.
- Wet-edge management: Rolling too large an area before reloading lets the edge dry, which causes lap marks and uneven sheen.
- Back-brushing and back-rolling: Working paint into the surface rather than just laying it on improves adhesion and fills minor texture.
- Mill thickness awareness: Most product data sheets specify a dry film thickness range; applying below it shortens life, and applying far above it invites cracking.
Curing Conditions and Application Timing
Ask your painter what the product data sheet says about recoat and full-cure times, and confirm the crew is scheduling around temperature and humidity, not just the calendar.
Weather matters too. Exterior painting is best done within the temperature and humidity range listed on the product label. Painting in extreme heat, cold, or rain can prevent proper curing.
Measurable Quality Checks Before You Accept the Job
You do not need to be a painter to verify the work. A short walkthrough can confirm the details that predict longevity:
- Prep check: Surfaces are clean, sound, and free of loose paint; patched areas are smooth and sanded.
- Coverage check: No thin or translucent areas when viewed at a low angle under raking light.
- Adhesion check: A small, inconspicuous area passes a tape-pull test without paint lifting.
- Finish check: No lap marks, drips, holidays, or visible brush and roller texture inconsistencies.
- Detail check: Caulk lines are continuous, edges are crisp, and fixtures and floors are clean of overspray and spatter.
A crew that expects these checks will usually pass them. A crew that resists them is telling you something about how the job was run.
How Long Does Exterior Paint Last, and What Changes It
Exterior paint lifespan depends on factors such as the surface and its exposure to the elements. To see which products hold up best locally, read our best exterior paint for North Texas guide.
Realistic Lifespan Ranges by Surface and Exposure
| Surface | Typical lifespan (well-prepped, quality coating) | What shortens it |
|---|---|---|
| Wood siding and trim | Roughly 5-10 years | Moisture intrusion, poor caulk, sun-facing exposure |
| Fiber cement siding | Roughly 10-15 years | Factory finish vs. field-applied paint, inadequate priming |
| Stucco and masonry | Roughly 8-15 years | Hairline cracks, efflorescence, trapped moisture |
| Previously painted surfaces | Often shorter than bare substrate | Poor adhesion of the old coat, chalking, incompatible products |
| South- and west-facing elevations | At the low end of the range above | UV, thermal cycling, and heat gain |
| Shaded or protected elevations | At the high end of the range above | Less UV and thermal stress |
What Changes the Number
Several factors shape how long exterior paint holds up:
- Sun exposure: South- and west-facing walls often fade and chalk faster.
- Moisture: Rain, sprinkler overspray, and poor drainage can cause peeling.
- Surface type: Wood, stucco, fiber cement, and masonry each behave differently, as the table above shows.
- Prep quality: Poor prep often shortens lifespan more than any other single factor.
- Coating system: A primer plus two topcoats in the manufacturer’s specified film thickness outperforms a one-coat shortcut.
- Maintenance: Regular cleaning and touch-ups extend the life of a paint job.
Maintenance and Lifecycle Cost
Exterior paint can be affected by sun and changing weather conditions.
Our team at Rooster Painting provides exterior painting services. Schedule your exterior painting consultation to talk through your options.
Signs a House Needs Repainting Before Damage Spreads
For a closer look at how to prevent exterior peeling, see our guide on how to prevent exterior paint peeling.
Booking a Professional Repaint for Lasting Results in North Texas
A paint job involves preparation, materials, application, and communication.
At Rooster Painting, we serve homeowners across Arlington and nearby areas with interior and exterior painting, drywall repair, cabinet painting, and popcorn ceiling removal. Our process starts with a free detailed written estimate and a free color consultation. We’re also insured, and our work comes with a warranty so you know what’s covered after the job is done.
Ready to talk through your project? Schedule a free quote and we’ll walk through the next steps with you.
Last Updated: October 28, 2026
Frequently Asked Questions
How long should a professional exterior paint job last?
Exterior paint lifespan depends on factors such as the surface, the product used, and exposure to the elements. Rooster Painting offers free detailed written estimates.
Does professional-grade paint last longer than budget paint?
Rooster Painting uses premium materials like Sherwin-Williams paint. For a quote, request a free detailed written estimate.
How does surface preparation affect paint durability?
Surface preparation can affect how a paint job holds up. Rooster Painting provides drywall repair and free detailed written estimates.
What maintenance helps a painted surface last longer?
Rooster Painting offers a worry-free warranty. Contact the company for details about its coverage.
